Touch Up Bare Spots On Glazed Kitchen Cabinet : Scandinavian Painted Pine Display Cabinet C.1920. | Display cabinet, Antique display cabinets ... - If the first round of stripper doesn't remove all of the paint, apply a second coat.
Touch Up Bare Spots On Glazed Kitchen Cabinet : Scandinavian Painted Pine Display Cabinet C.1920. | Display cabinet, Antique display cabinets ... - If the first round of stripper doesn't remove all of the paint, apply a second coat.. The three photos below are all the same table after the touch up was completed.we have placed an oval around a natural feature of the wood grain to help you orient yourself to where the damage was. If necessary, apply a second coat to get a darker color, or combine stain colors for a custom mix. If the first round of stripper doesn't remove all of the paint, apply a second coat. After applying the wax, give it about 30 minutes to dry. A touch up pen like this can help restore some of this missing color.
When wiping, you'll notice that the glaze sticks to the cabinet's corners and surface details,. If desired, wipe the entire cabinets with mineral spirits one more time. Then wipe down the surface with a soft cloth. Paint it on liberally to all of the areas where you want it to fill in the details. Leave the stripper for 30 minutes, then scrape away, following the wood grain.
Touch Ups | KraftMaid at The Home Depot from homedepot.kraftmaid.com To apply liquid stripper, spread it around evenly with a chip brush to create a nice thick layer. Using a small craft brush, tap paint only into area that has been chipped. Place a small dab of the wax onto the steel wool and apply it in smooth, circular motions. Paint the glaze on a few cabinet doors or drawers at a time. Dab stain onto a cloth and rub the color into the bare wood, in the direction of the wood grain. Allow the wax to dry onto the wood furniture. I also had old oak cabinets with a veneer side. If there is no effect, it is paint or polyurethane.
The three photos below are all the same table after the touch up was completed.we have placed an oval around a natural feature of the wood grain to help you orient yourself to where the damage was.
To apply liquid stripper, spread it around evenly with a chip brush to create a nice thick layer. Apply a layer of the stripper with a brush and follow the directions on the container for removal time. Apply the glaze with a sponge brush. These come in a variety of wood tones and are used just like a felt marker. Pure espresso cabinet small kit. If you want to deepen the color in general, go ahead and stain the entire cabinet by brushing the stain on and wiping off the excess with a clean rag. Lightly sand any chipped areas using 320 grit sandpaper. When i'm painting something a much lighter color than what it already is. In this way, you will see missed spots as the finish is applied. I only needed to brush on 2 coats…1st coat was a lil streakyn icouldsee sign of old finish but i remained calm n followed pete b directions. Give the cabinets a good cleaning using a spray bottle filled with water and dawn dish soap or krudkutter prepaint cleaner. If necessary, apply a second coat to get a darker color, or combine stain colors for a custom mix. Dab stain onto a cloth and rub the color into the bare wood, in the direction of the wood grain.
Troubleshooting polyurethane finishes on kitchen cabinets. Then wipe down the surface with a soft cloth. Depending on the size of the problem area you can sand it down (small) or use a liquid paint stripper (large). Apply a layer of the stripper with a brush and follow the directions on the container for removal time. If the cotton ball sticks or the finish softens, it's varnish, lacquer or shellac.
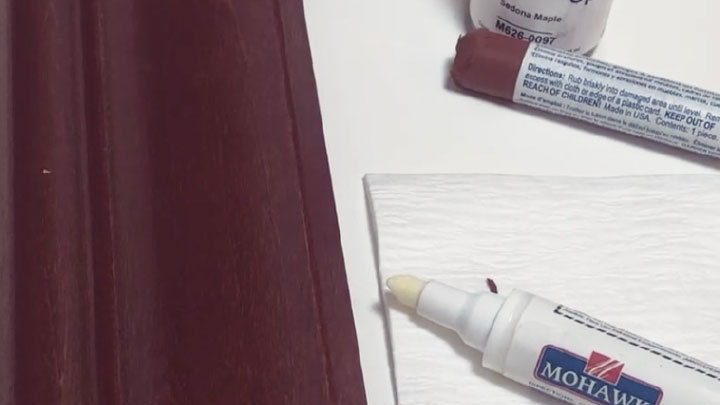
Cabinet-Glazing | Diy kitchen renovation, Cabinet glazing, Rustic kitchen design from i.pinimg.com Depress the pen's felt tip on a piece of cardboard or scrap wood until the tip becomes saturated, but not dripping. These come in a variety of wood tones and are used just like a felt marker. I typically will only use a norwex cloth and water, which has worked well for me. Pure espresso cabinet small kit. If the first round of stripper doesn't remove all of the paint, apply a second coat. It will look a mess, don't panic. When i'm painting something a much lighter color than what it already is. Dab stain onto a cloth and rub the color into the bare wood, in the direction of the wood grain.
I also had old oak cabinets with a veneer side.
I have a beautiful jelly cupboard my husband built for me when we were first married 25 years ago, and i love it so much, except it is stained a orangey honey color (it is pine) that was popular in country decor back then and clashes with my current kitchen cabinets which are more of a dark oak color. If the cotton ball sticks or the finish softens, it's varnish, lacquer or shellac. Then wipe down the surface with a soft cloth. Give the cabinets a good cleaning using a spray bottle filled with water and dawn dish soap or krudkutter prepaint cleaner. Using circular wiping motion, quickly wipe the cabinet with a clean rag to eliminate the excess glaze. I only needed to brush on 2 coats…1st coat was a lil streakyn icouldsee sign of old finish but i remained calm n followed pete b directions. A lot of times, if you had to sand your piece of furniture or degloss it, you usually won't need a primer. Take the cotton ball test to find out. Let's say i'm painting something white that started out black. Lightly sand any chipped areas using 320 grit sandpaper. Revitalizing wood cabinets can change up the aesthetic as well as the mood of one of the most popular spots in the home. Apply the glaze with a sponge brush. I also had old oak cabinets with a veneer side.
When the pencil marks begin to disappear. After applying the wax, give it about 30 minutes to dry. Finally, i remove all surface dust with a clean rag or tack cloth. Lightly sand any chipped areas using 320 grit sandpaper. A lot of times, if you had to sand your piece of furniture or degloss it, you usually won't need a primer.
Glaze - Baked Goods | CraftyBaking | Formerly Baking911 from www.craftybaking.com If you want to deepen the color in general, go ahead and stain the entire cabinet by brushing the stain on and wiping off the excess with a clean rag. It will look a mess, don't panic. Place a small dab of the wax onto the steel wool and apply it in smooth, circular motions. After sanding, clean your cabinets to remove the dust. When the pencil marks begin to disappear. These come in a variety of wood tones and are used just like a felt marker. Customizing the pattern conserves finish material by reducing overspray. After applying the wax, give it about 30 minutes to dry.
If desired, wipe the entire cabinets with mineral spirits one more time.
Or, your cabinets (or walls) are knotty pine, and you don't want any sap to come through (yes, that's a concern with knotty pine), and you want to seal off the knots in the wood. Revitalizing wood cabinets can change up the aesthetic as well as the mood of one of the most popular spots in the home. There are two cases though where i always tend to use a primer before applying my actual paint: Depress the pen's felt tip on a piece of cardboard or scrap wood until the tip becomes saturated, but not dripping. Lightly sand any chipped areas using 320 grit sandpaper. Dab stain onto a cloth and rub the color into the bare wood, in the direction of the wood grain. Place a small dab of the wax onto the steel wool and apply it in smooth, circular motions. I typically will only use a norwex cloth and water, which has worked well for me. A lot of times, if you had to sand your piece of furniture or degloss it, you usually won't need a primer. Troubleshooting polyurethane finishes on kitchen cabinets. Dip the rag into the stain and rub it on the cabinets letting more stain seep into the creases. I have a beautiful jelly cupboard my husband built for me when we were first married 25 years ago, and i love it so much, except it is stained a orangey honey color (it is pine) that was popular in country decor back then and clashes with my current kitchen cabinets which are more of a dark oak color. After applying the wax, give it about 30 minutes to dry.